You have probably all experienced it, the formation of air bubbles in microfluidics is a very common phenomenon and can in the worst case totally ruin an experience of several days.
In other cases, without ruining the experiment, air bubbles can influence the result obtained, which can be damaging when the results are published. These bubbles appear at different times: during the loading of the microfluidic chip, during an intervention on the same microfluidic device, or after a rest period in the incubator. Fortunately, there are now devices that allow to manipulate your chip while avoiding air bubbles.
In this review, we will first look at why these air bubbles form. We will then introduce tips and tricks to avoid them, and devices that will make sure you do not get bubbles in your microfluidic device.
Why do air bubbles appear?
Many parameters should be taken into account when deciding to use microfluidics as the main tool for scientific experiments. Indeed, an air bubble is likely to form when there are small surface irregularities (Harvey nuclei), known as a "catalyst", which can trap a few nanolitres of air. These few nanolitres of air can be trapped on the unique condition that the contact angle of the liquid instilled at this point has a low wettability. The size of this bubble will vary if temperature and pressure conditions change.
The choice of materials, the type of manufacture and the coating will be decisive in the appearance of air bubbles. These choices will be even more important if the microfluidic device is home-made.
Unfortunately, this is not the only way to create air bubbles in the microfluidic device. Indeed, the other way is to bring the air bubble inside the device, not intentionally of course, but intervening on his chip. The most common example is the supply of a second solution (drug, dyes, cells,…) by tubing connection. This step is critical, as forgetting an air bubble in the tubing will allow its introduction and potentially its migration to another region of the device, which will damage the experiment.
Air bubbles can appear during microfluidic experiments if one or several fittings are leaking. Several users have also reported that PDMS, which is a porous material, can introduce air bubbles inside the microfluidic device, especially with long experience.
Finally, another critical point is the dissolved gas. Indeed, the gas contained in gaseous form in the liquids used during the experiment can cause the formation of air bubbles in the event of a sudden change in temperature and pressure.
Changes in pressure can also cause the desorption of a film of air present on the wall of a microchannel.
💡Tips and tricks to avoid air bubbles
- When adding a second liquid to the chip, allowing its temperature to equilibrate with the temperature of the first liquid in the chip. A difference in temperature between the two liquids could increase the size of pre-existing bubbles due to the Harvey nuclei.
- The presence of Harvey nuclei is often found when using PDMS to manufacture microfluidic device. One of the ways to avoid a low wettability of the contact angle of the fluid with the wall is to increase the hydrophilicity by using an oxygen plasma treatment, or by functionalizing the surface by adding hydrophilic groups (surface treatment).
- Check the tightness of the system between the different parts of the chip, but also of the whole device (connectors, etc.). As seen in the review on microfluidics volumes, connectors are sources of dead volume but also of air bubbles. To make sure that the sealing is correctly carried out, you can use glues or epoxy resins.
- Another point regarding connectors is to reduce their number to the strict minimum necessary.
Devices to prevent air bubbles in your microfluidic chips
If you are tired of missing out on your microfluidics experiments because of air bubbles, then these devices are for you! In this section, Darwin Microfluidics selected specially for you three devices to limit air bubbles.
Bubble trap system
The bubble trap is a passive device with several benefits among which:
- In-line removal of bubbles, with or without vacuum connection
- Avoids air bubbles in the vicinity of your cells
- Easy change of membranes to avoid contamination
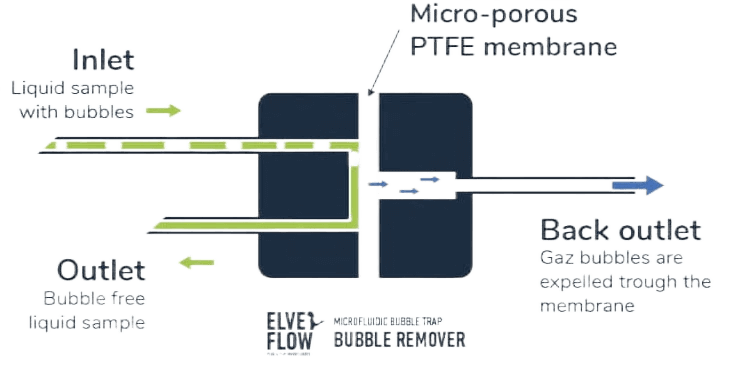
This bubble trap has a PTFE membrane. The solution containing bubbles is pushed into the trap and the bubbles are removed through a micro-porous Teflon membrane. You can optionally choose to connect a vacuum pump to the rear outlet of the trap (active mode) to increase the bubble trap performance. But the trap usually shows significant bubble trapping performance on most setups even if no pump is connected (passive mode).
Injection / Shut-off valve
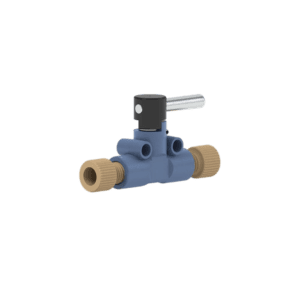
This valve will allow you to work on your device without having to disconnect and reconnect your tubing, which can create air bubbles.
4-Port Manual Switching Valves
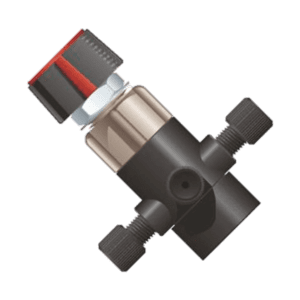
These manual valves are suitable for applications that requires operator control and connections among multiple fluid systems. They allow you to work on your device without handling it too much and thus limit the introduction of air bubbles. They allow you to easily switch between two fluid paths by turning the control head and without disconnecting the lines. Three versions are available according to the switching option: diagonal flow, right angle “L” flow and Single “T” flow.
Understanding how a microfluidic system works is a prerequisite for finding ways to avoid air bubbles. From the choice of the liquid to the design of the chip, all the steps must be carried out with the understanding that bubbles can appear precisely at each of these stages. It is important to note that there is no single way to avoid or eliminate bubbles as there is no single cause of bubble formation. Each user must analyze his system to find the best way to produce a robust device and fortunately, several commercial devices are emerging to facilitate the researcher’s work.
